Scatena l'artista che è in te e padroneggia la manipolazione delle immagini con il potente Photoshop Brush Tool! Questo strumento essenziale va oltre la semplice pittura a mano libera: può aggiungere colore, perfezionare maschere e trasformare le tue foto in innumerevoli modi. Ma per conquistare questa bestia versatile è necessario sapere come funziona.
La buona notizia? Comprendere lo strumento Pennello non significa solo padroneggiare uno strumento, ma svelare i segreti di molti altri in Photoshop! Pronti a migliorare il vostro gioco di fotoritocco? Questa guida completa si addentra nelle profondità dello strumento Pennello, dotandovi delle conoscenze necessarie per diventare un vero mago della manipolazione delle immagini. Immergiamoci!
Che cos'è lo strumento pennello di Photoshop?
Questo versatile strumento ti consente di creare pennellate come un pennello tradizionale, aggiungendo colore e texture alle tue immagini. Trovalo facilmente nella barra degli strumenti (scorciatoia: B) e inizia a dipingere!
Ecco come funziona: ogni clic o tratto di penna aggiunge un segno sagomato, che si trasforma in un tratto fluido mentre trascini. Per padroneggiare lo strumento Pennello, prendi familiarità con queste terminologie chiave:
1. Punta del pennello
Prendi il controllo delle tue pennellate con il Impostazioni della punta del pennello! Questa opzione chiave dello strumento Paint Tool ti consente di perfezionare il modo in cui il colore atterra sulla tua tela. Scegli tra i preset integrati o regola le dimensioni (con le scorciatoie da tastiera!) e la durezza (da bordi morbidi a netti) per creare la tua visione artistica. Ricorda, un tocco leggero con Control-Option-Click (Mac) o Alt-Right-Click (Windows) ti consente di regolare dinamicamente le dimensioni mentre dipingi! Prova oggi stesso lo strumento Brush di Adobe Photoshop.
2. Modalità di fusione
Vuoi che le tue pennellate si fondano perfettamente, sbiadiscano in modo sottile o addirittura cancellino ciò che c'è? L'arma segreta dello strumento Pennello è il Modalità di fusione! Pensalo come un centro di controllo per il modo in cui il tuo pennello interagisce con la tela. "Normale" la dipinge così com'è, mentre "Dissolvenza" aggiunge un bordo sfocato.
Vuoi dipingere "dietro" i tratti esistenti? Scegli la modalità "Behind". Ti senti distruttivo? La modalità "Clear" cancella come una gomma digitale. Con decine di modalità da esplorare, il modo migliore per padroneggiarle è semplicemente sperimentare e vedere come interagiscono con la tua arte!
3. Colore di primo piano e opacità
Padroneggia le tue pennellate in Fotoritocco controllando il colore con il Selettore colore in primo piano, situato in fondo alla barra degli strumenti Strumenti. Basta cliccarci sopra e scegliere la tonalità desiderata: è semplicissimo! Questo ti consente di passare senza problemi da un colore all'altro e di dare vita alla tua visione artistica. Il cursore Opacità controlla quanto siano trasparenti le tue pennellate! Pensalo come la densità della vernice: 100% è completamente opaco, come la vernice solida, mentre valori più bassi si fondono di più con lo sfondo, creando un effetto traslucido o sbiadito.
4. Flusso
Controlla la quantità di vernice applicata a ogni pennellata, come la sensibilità alla pressione di un pennello vero. A differenza di Opacity, che controlla la trasparenza della vernice, Flow controlla la "quantità" applicata. Immagina di spremere un tubetto di vernice; Flow determina la quantità di vernice che esce a ogni pennellata. Ciò ti consente di creare lentamente colore, luce e ombre per una profondità realistica, senza sollevare costantemente il pennello o la penna! Esplora ora lo strumento Pennello di Adobe Photoshop.
Utilizzi dello strumento pennello di Photoshop
Lo strumento Pennello di Photoshop è il tuo pennello digitale che offre infinite possibilità di espressione creativa.
- Creazione di dipinti realistici o stilizzati: Grazie alle varie impostazioni e preimpostazioni del pennello, puoi dipingere paesaggi, ritratti, astratti e molto altro.
- Aggiungere texture e dettagli: Aggiungi texture come venature del legno, tessuto o nuvole per creare profondità e realismo.
- Disegno illustrazioni e fumetti: Utilizza pennelli strutturati per tratteggio, tratteggio incrociato e altre tecniche di disegno.
- Ritocco locale: Schiarisci e brucia con pennelli morbidi per schiarire o scurire delicatamente alcune aree per levigare la pelle o effettuare altre regolazioni.
- Aggiungere effetti creativi: Applica pennellate con texture o motivi per ottenere effetti artistici come grunge, acquerello o perdite di luce.
- Creazione di elementi di design: Progettare loghi, icone, pulsanti e altri elementi grafici con forme di pennello personalizzate.
- Scultura digitale: Scolpisci modelli 3D dipingendoli con profondità e ombre utilizzando pennelli specializzati.
- Mascheratura e selezioni: Crea selezioni complesse dipingendo su un livello maschera con lo strumento Pennello di Photoshop.
Per ulteriori informazioni, visita il sito web di Adobe.
Come dipingere con lo strumento pennello di Photoshop?
Vuoi dipingere sulle tue foto? Lo strumento Pennello ti consente di fare proprio questo! Funziona come un pennello morbido, aggiungendo colore ovunque clicchi e trascini. Ecco come:
- Scegli un colore: Scegli il tuo colore preferito tra quelli disponibili.
- Prendi il pennello: Fare clic sull'icona dello strumento Pennello (sembra un pennello!).
- Scegli uno stile di pennello: Nel pannello "Pennelli", seleziona un pennello adatto alle tue esigenze (spesso, sottile, strutturato, ecc.).
- Regola le impostazioni: Gioca con opzioni come "modalità" (come la vernice si fonde con l'immagine) e "opacità" (quanto è trasparente o solida la vernice) per ottenere l'effetto perfetto.
- Inizia a dipingere: Fai clic e trascina sulla tua immagine per aggiungere colore. Vuoi una linea retta? Tieni premuto "Shift" mentre fai clic sui punti di inizio e fine. Per un effetto vernice spray, tieni premuto il pulsante del mouse senza trascinare.
Ricorda, la pratica rende perfetti! Sperimenta pennelli e impostazioni diverse per liberare l'artista che è in te.
Levigatura dei tratti per le tue pennellate
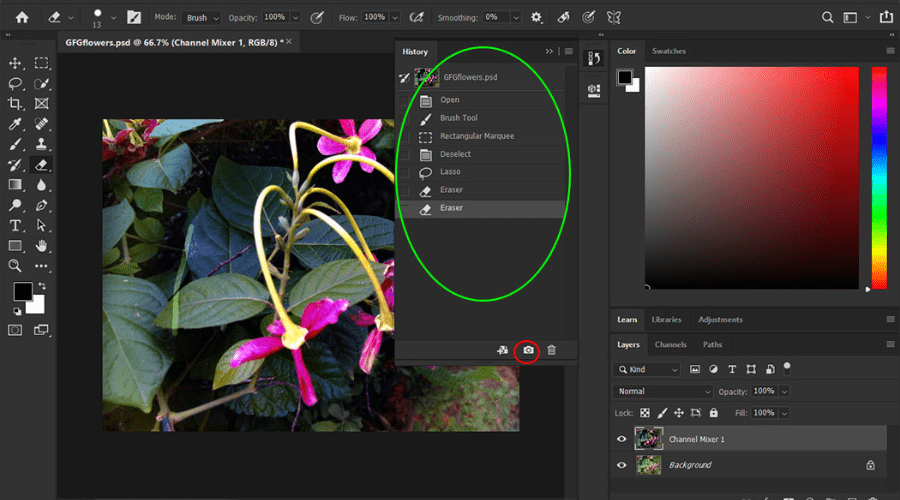
Stanco delle linee tremolanti nei tuoi lavori di Photoshop? Inserisci "Levigatura” nella barra delle Opzioni quando usi Pennello, Matita, Pennello Mixer o Gomma. Un valore più alto (0-100) rende i tuoi tratti più fluidi, mentre 0 mantiene l'aspetto old-school. Inoltre, puoi scegliere "Modalità" per un controllo ancora maggiore, come ad esempio fluidificare solo la pressione o l'angolazione dei tuoi tratti per effetti vari. Sperimenta e trova il tuo livello perfetto di fluidità!
La levigatura dei tratti nella tua app di disegno ti copre le spalle! Ecco cosa fanno le diverse modalità che ottieni cliccando sull'icona dell'ingranaggio:
1. Modalità corda tirata
Dipingi solo quando "trascini" il cursore, come se stessi tirando una corda tesa. In questo modo eviti di lasciare segni se ti fermi o cambi direzione.
2. Recupero dell'ictus
Anche se ti fermi brevemente, questa modalità consente alla vernice di raggiungere il cursore, creando linee più fluide e continue.
3. Recupero alla fine della corsa
Termina il tuo tratto senza problemi anche se hai lasciato andare prima. Dipinge automaticamente dall'ultimo punto fino a dove ti sei fermato.
Conclusione
Non lasciarti intimidire dal Strumento pennello di Adobe Photoshop! È potente, sì, ma anche essenziale e sorprendentemente divertente. Consideralo come il tuo pennello digitale, che ti consente di creare qualsiasi cosa, da dipinti realistici a elementi di design grafico. Questa guida, si spera, ti abbia aperto gli occhi sulla versatilità dello strumento Pennello. Non aver paura di sperimentare e di iniettare un po' di stravaganza nel tuo lavoro! Ricorda, infinite possibilità creative ti aspettano, a portata di pennellata. Per maggiori informazioni, visita Findwyse.


